Oct 9, 2013

How to Transfer Music from iPod to Mac

How can I transfer music from my iPod to a new Macbook Pro?
My laptop got ruined in a car accident, so I bought a new Macbook. However, I am having trouble transferring the music. When I connect it to the computer, and iTunes opens, it won't allow me to select "Enable Disk Use." It's an iPod classic that was used on a PC. I know there is a way to retrieve purchases from iTunes, but a lot of music I have on my iPod came from other sources... I appreciate any help I can get!

According to this question, you should notes that music stored on your computer might become lost or corrupted, and you could find yourself in a situation where your iPod has the only copies of the files. You can manually move the music files from your iPod onto a computer so that you can keep your music, without having to repurchase titles that you already own. In terms of the stability and security of the data, iPod Transfer can help you in this way. You can transfer music from iPod to Mac and backup them on computer in case of some incidents like the above. What’s more, iPod Transfer for Mac can also sync your music files of iPod to Mac automatically the moment you connect your iPod to the computer. You can go through the instructions below to know about how iPod Transfer for Mac works.


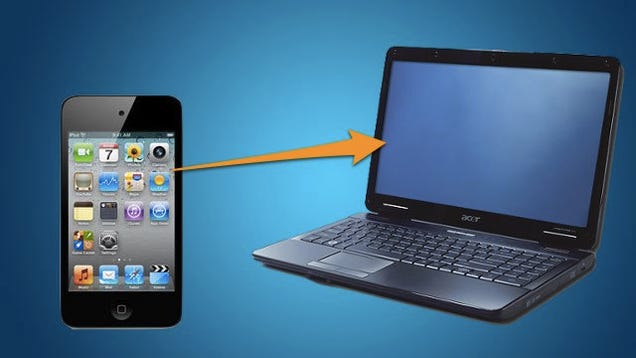
Step 1: Run this software and connect iPod to Mac


Step 2: Transfer music from iPod to Mac


Step 3: Save the music to folder


Step 4: Finish the transferring

iPod Transfer is specially designed for Mac OS, and you don't need to worry about how to transfer Music from iPod to Mac. What's more it support to back up more iPod contents from iPod to Mac, iPod to iTunes, iPod to iPod and Mac to iPod transfer is also available.
It can transfer music from iPod to Mac free, as well as movies, photos, books, Podcasts, ePub, PDF, TV Shows ,etc. 

Oct 7, 2013

How to Transfer Music from iPod to Computer

As a music lover, you cannot miss the smart music player – iPod classic. As a professional music player, the device enables you to store huge numbers of songs and offers you excellent tone quality. You can enjoy and relax yourself after busy work. However, new music comes up everyday. One day you will find that your iPod classic is just full and cannot store any song. Thus you need to copy these songs to your computer to save them for a long time.
In order to copy music from iPod classic to your computer, you may need a special iPod to computer transfer tool to help you, and that's why I here to write the article. The best iPod to computer transfer tool is called iPod Transfer, which enables you to do the transfer in just one click. Can't wait experiencing iPod Transfer? Now I will show you how to do the transfer step by step.


Step 1: Run Software and Connect iPod to Computer

Step 2: Click "Export" button and Start Transfer

Step 3: Set the Output folder at Advanced

Step 4:View the transferred Music files on Computer

With iPod Transfer software, you can quickly know how to transfer music from iPod to Computer, and even transfer your songs, playlists and videos straight to iTunes. And it works with all models of iPod, iPhone and iPad and is available for both PC and Mac. Download to have your favorite songs on your iPod easily accessible on your computer.

Sep 26, 2013

How to Transfer Music from iPhone to iTunes

It is inevitably for someone that they may lose their iTunes library, or they encounter computer crash and have to format the computer. Consequently, where are the data? Where are their favorite music, photos, and videos? Can they get them back and how? Since the data are still on the iPhone, all the data including the songs can be transferred from iPhone to iTunes library as easy as you can expect. iPhone to iTunes Transfer is a very useful software which you can help  you find out how to transfer music from iPhone to iTunes.
iPhone Transfer can help you transfer songs to iTunes library as well as copy music to computer easily within a few minutes. You can have a look at the instructions about the operating process about iPhone to iTunes Transfer software.


Part 1: How to Transfer Music from iPhone to iTunes For Windows User?
Step 1: Lauch iPhone to Computer Transfer then plug in your iPhone/iPod/iPad
Step 2 : Select Music files and click “Export” button to iTunes
Step 3: Set the Output folder at Advanced->Options
Step 4: View the transferred music files on Computer


Part 2: How to Transfer Music from iPhone to iTunes For Mac User?
Step 1: Download, install and run the software
Step 2: Select music you want to transfer in iPhone list
Step 3: Transfer music from iPhone to iTunes library

When it's done, you've got your iPhone music neatly and conveniently on your Mac, and you can add them to your library. That's all there is to move music from iPhone to iTunes on Mac with iPhone Transfer for Mac.
iPhone Transfer supports various kinds of multimedia files transferring, and it also keeps compatible with iPad and iPod touch. It is a must-have utility to keep your files of iPod, iPad or iPhone safe.
Download the iPhone Transfer free to transfer music from iPhone to iTunes, copy songs from iPhone to iTunes, as well as movies, photos, books and more.

Sep 21, 2013

How to Transfer Music from iPhone to Mac

Occasionally we are in need of transferring music files from iPhone to Mac for backup, so that it can prevent us from losing our favorite songs. Maybe you have encountered problems when you want transfer music from iPhone to Mac directly. At this right moment you got to know that you cannot extract anything out without the help of a transfer tool. iPhone Transfer for Mac is such a helpful software to solve this kind of tough problems, it can transfer music, videos, photos and any other files from iPhone, iPad, iPod Touch to Mac. With the aid of it, you can easily store your music on your Mac, thus setting free as much storage as you want of your iPhone.


This article will show you the detailed steps of operating iPhone Transfer for Mac, you can know specifically about how to extracting the music files out of your iPhone and making a backup of it on your Mac.


Step 1: Download and install the iPhone to Mac Transfer software

Step 2: Transfer iPhone music to Mac

1) Click "music" icon to open iPhone music/movie library folder and see all the files are on the interface.


2) Select and check your favorite music and press "Export checked files to local" button to transfer music files from iPhone to Mac.


3) Press "Save" button in the pop-up box
More tips of iPhone Music to Mac Transfer software:

iPhone to Mac Transfer software can help you export music/video off your iPhone and make iPhone music/video backup on Mac local fast and easily, without iTunes' help.

1) iPhone 5 is available for software, sync music/video to iPhone 4S

2) iOS 8.0, iTunes 11 and newest operating system for iPhone

3) Move files between iPhone and Mac, iPhone to iTunes

4) All portable devices supported: iPhone, iPad, iPod

I am sure that after you have read this article or even you have tried this advanced iPhone Transfer for Mac software already, you will thumb up to its fantastic function! No need to worry about how to transfer music from iPhone to Mac. Don’t hesitate to have a try of it!

Sep 16, 2013

How to Transfer Music from iPhone to Computer

For many iPhone users, they are quite familiar with downloading music to an iPhone. However, when they want to know how to transfer music from iPhone to computer, they are at a loss to know what to do. We should know as much as we could to make the most use of iPhone, thus becoming a skillful iPhone user. I think the priority is that we should know more about the specific software of iPhone to make the best use of it. In terms of copying songs from iPhone to computer, here I will introduce you a specific iPhone software—iPhone Transfer.
iPhone Transfer can transfer songs, videos, photos, playlists, podcasts and more from iPhone to computer for backup. It will complete transferring within a few minutes.


Taking music as an example, the following tips will show you how to transfer music from iPhone to computer.
Step 1: Launch iPhone to Computer Transfer then plug in your iPhone/iPod/iPad

Step 2: Select Music files and click “Export” button to Computer/iTunes

Step 3: Set the Output folder at "Advanced->Options"

Step 4: View the transferred music files on Computer

By following the instructions above, you can get a more detailed understanding about iPhone Transfer. It can copy music files as well as other contents like: photos, videos, playlists, podcasts, etc. It can surely be your able aider in your daily life.

Aug 28, 2013

How to Transfer Music from iPad to Mac

I just bought an iPad 2 and was wondering, since there’s no APPs for downloading free music like my android phone, I am very treasure my music of iPad. How I can transfer music from my iPad2to Mac in case of missing?
This is asked on the forum by one guy who is curious about the way of transferring music from iPad to Mac.
There is a good solution on transferring music from iPad to Mac by using iPad Music to Mac Transfer. iPad Transfer for Mac can help you easily transfer iPad music to Mac with only a few mouse clicks. And this software can not only copy iPad songs to Mac, but also transfer movies, photos, Voice Memo, Podcast and TV show easily and fast. You can take a glance at the instructions below to know more about the iPad Music to Mac Transfer.


Instructions 1: How to Transfer Music from iPad to Mac?

Step 1: Install and run the software
Download and launch iPad to Mac Transfer. Once connect your iPad to Mac computer, and all information about your iPad itself, such as Type, Capacity, Version, Serial Number, and Format, will be shown on the main interface. And all iPad folders you stored into are shown in the left of iPad list panel.

Step 2: Transfer iPad Music to Mac
Click "Music" icon to open iPad music library folder and see all the iPad music files are on the interface. Select and check your favorite music and press "Export checked files to local" button to transfer music files from iPad to Mac. Before you transfer iPad music to Mac, you can set a target folder to save the iPad music backups.

You should pay attention that the functions of iPad Music to Mac Transfer are multiply. In addition to transferring music, it can also transfer photos from iPad to Mac, videos, SMS and so on. You can make full use of your iPad with the help of it.

Aug 14, 2013

How to Transfer Music from iPad to Computer

Almost everybody knows how easy it is to get music onto an iPad with the help of iTunes, but have you ever tired to get music off an iPad onto a new computer? As it turns out, transferring music from an iPad to a new or different computer isn't a feature that is supported in iTunes. Nonetheless it’s easy to do on your own, and we’ll walk you through exactly how to copy all your music from an iPad and back to a computer. iPad Transfer allows you to transfer iPad music to computer. Aside from transferring music, you can also backup all iPad files to computer, including photos, videos, contacts, SMS. And iPad to Computer Transfer supports you to transfer music from iPad to iTunes library. The following is the detailed instructions about the operating steps of iPad to Computer Transfer software.


Instructions: How to Transfer Music from iPad to Computer

Step 1: Run Software and Connect iPad to Computer
Run the software, and connect your iPad or iPad mini to your computer via USB cable. After done, the iPad/iPhone/iPod icon and its library and playlists will appear in the Device list. If the device is enabled, the files (songs/movies/photos) will be shown in the list.

Step 2: Click “Export” button and Start Transfer
The “Export Mode” dialog box will pop up after you click “export”, you may select where you want to store your files whether in iTunes or to your disk. After you have chosen where you want to put your music files, just click “ok” then this will start the transfer of Music from iPad to computer.

Step 3: Set the Output folder at Advanced
After you clicking the Export button, the following window will pop up, you can choose transferring iPad to computer or iTunes directly. You can set the output folder at Advanced->Options before transferring.

Step 4: View the transferred Music files on Computer
When the transferring finished, the following window will pop up. It shows that how many files have been done. You can click the "OK" button then the output folder will automatically open and you may now start browsing your photo files on your computer.

With this iPad to Computer Transfer software, you can also transfer music from iPad/iPhone/iPod to computer, as well as transfer videos, photos, books and more from iOS decive to computer/iTunes. You can do with the iPad to Computer Transfer software step by step as the above instructions show, after that you will surely marvel at its multifunction.